Why a DIY Fire Pit is the Perfect Backyard Upgrade
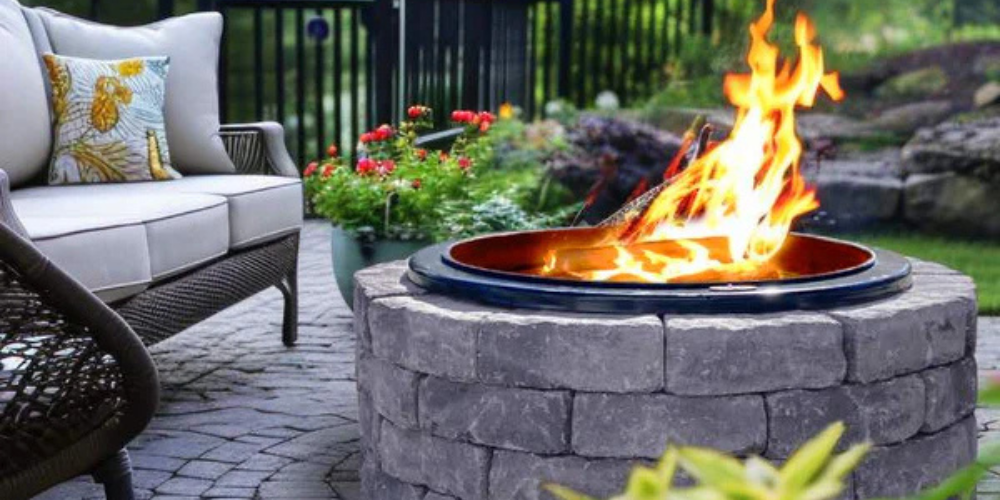
A fire pit is more than just a backyard feature; it’s a gathering space that transforms your outdoor area into a warm, inviting retreat. Whether you’re hosting family gatherings, cooking over an open flame, or simply enjoying a cool evening by the fire, a well-designed fire pit adds style, comfort, and functionality to your backyard.
Building your own fire pit with a seating area allows you to customize the design to match your landscape while saving money compared to store-bought options. Plus, DIY fire pits are budget-friendly, durable, and easy to maintain. This guide will walk you through every step, from choosing materials to final touches, so you can create the ultimate Walden Backyards-inspired outdoor experience.
Planning Your DIY Fire Pit: Key Considerations Before You Start

Checking Local Fire Pit Regulations
Before you start digging, check your local fire codes and zoning laws. Many municipalities have rules regarding fire pit placement, size, and fuel type. In some areas, fire pits must be at least 20 feet away from structures, including your home, fences, and overhanging trees. Also, call 811 to locate underground utility lines to prevent damage when digging.
Choosing the Best Location
Selecting the right spot for your fire pit is crucial. Consider the following:
-
Safety: Keep it away from low-hanging branches, fences, or structures that could catch fire.
-
Accessibility: Place it near an existing patio or create a dedicated fire pit zone with a walkway.
-
Wind Direction: Choose a spot that minimizes smoke blowing toward seating areas.
-
Drainage: Avoid low-lying areas where water collects, which can affect the longevity of your fire pit.
Materials You’ll Need
Before you begin, gather all the necessary materials. Here’s what you’ll need:
-
Fire Pit Kit or Concrete Blocks – Prepackaged kits simplify the process, but you can also use individual blocks.
-
Paver Sand – Helps level and stabilize the base.
-
Pea Gravel or Crushed Stone – Adds drainage and a polished look to the seating area.
-
Landscape Construction Adhesive – Secures fire pit stones together.
-
Tamper – Compacts the sand and gravel for stability.
-
Weed Block Fabric – Prevents grass and weeds from growing in your seating area.
-
Tape Measure & Spray Paint – For marking the fire pit and seating area.
-
Mallet & Level – Ensures stones are evenly placed.
-
Fire Pit Chairs – Choose durable, weather-resistant outdoor seating.
Step 1: Mark and Excavate the Fire Pit Area

Marking Your Fire Pit Space
Using a tape measure and spray paint, mark the desired fire pit area. A standard size is 36 to 44 inches in diameter, but you can customize it based on your space. If you're adding a seating area, extend the markings 5-6 feet from the fire pit for a comfortable layout.
Digging and Leveling
-
Use a shovel to dig 2-3 inches deep in the marked area.
-
Remove grass and debris, ensuring a smooth, even surface.
-
If you’re adding a seating area, extend the excavation to include that space.
-
Use a tamper to compact the soil for a stable base.
Step 2: Build the Fire Pit Base

A strong foundation ensures a long-lasting, stable fire pit.
-
Fill the excavated area with 2 inches of paver sand.
-
Tamp down the sand to create a level surface.
-
Pour a layer of pea gravel or crushed stone over the sand for better drainage.
-
Use a level to check evenness before proceeding.
Step 3: Constructing the Fire Pit Walls

Laying the First Layer of Stones
-
Arrange the first ring of stones on the compacted base.
-
Ensure each stone is level and fits snugly with the others.
-
Use a rubber mallet to adjust and align stones properly.
Stacking Additional Layers
-
Apply landscape adhesive between each stone layer.
-
Stagger the seams to create a stronger, interlocking structure.
-
Leave small ventilation gaps to allow airflow for a cleaner burn.
-
Stack at least three layers for durability.
Adding a Fire Pit Liner (Optional)
For a cleaner, more finished look, insert a metal fire ring or fire bricks inside the pit. This protects the stones from heat damage and extends the life of your fire pit.
Step 4: Designing the Fire Pit Seating Area

A well-planned seating area enhances the overall experience. Here’s how to create a functional and comfortable space:
Installing Weed Block Fabric
-
Lay weed block fabric over the excavated seating area.
-
Secure it with landscape pins to prevent shifting.
Adding Pea Gravel or Crushed Stone
-
Pour a 2-inch layer of pea gravel or crushed stone over the fabric.
-
Rake it evenly for a smooth finish.
-
Compact it using a tamper for stability.
Choosing the Right Seating
-
Adirondack chairs are classic, durable, and comfortable.
-
Bench seating adds a rustic, communal feel.
-
Tree stump seating provides an organic, budget-friendly alternative.
-
Outdoor cushions and rugs add extra comfort and warmth.
Step 5: Final Touches and Enhancements

Make your fire pit area unique and inviting by adding these finishing touches:
Fire Pit Accessories
-
Fire grate: Improves airflow and produces a cleaner, more efficient burn.
-
Spark screen: Prevents embers from escaping, ensuring safety.
-
Cooking grate: Turn your fire pit into a grilling station.
Outdoor Lighting
-
Use solar path lights to illuminate the area at night.
-
Hang string lights for a cozy, festive ambiance.
-
Add LED lanterns for extra visibility.
Landscaping & Privacy
-
Surround your fire pit with potted plants or hedges for a natural look.
-
Use decorative fencing or trellises to enhance privacy.
-
Add stone planters or flower beds to integrate the fire pit into your landscape.
Fire Pit Safety Tips
-
Keep a fire extinguisher or bucket of water nearby.
-
Only burn dry, seasoned wood to reduce smoke and emissions.
-
Never leave a fire unattended, especially in windy conditions.
-
Check weather conditions before lighting a fire.
-
Fully extinguish the fire before leaving the area.
FAQs
What’s the best fire pit material for longevity?
Fire bricks, stone pavers, and metal liners provide durability and heat resistance.
How do I maintain my fire pit?
Regularly remove ash, check for loose stones, and cover when not in use.
Can I use regular gravel for my fire pit base?
It’s better to use pea gravel or crushed stone, as regular gravel can trap moisture and explode under high heat.
What’s the ideal distance between the fire pit and seating?
4-6 feet allows for comfortable movement and heat distribution.
Is a DIY fire pit more affordable than buying one?
Yes! DIY fire pits typically cost $50-$200, while pre-built ones can exceed $500.
Conclusion: Enjoy Your New Fire Pit!
Building a DIY fire pit with a seating area creates a cozy, inviting space for relaxation and entertainment. With proper planning, durable materials, and thoughtful design, you can enjoy countless nights by the fire with family and friends.
Start your project today and bring Walden Backyards-inspired warmth and charm to your outdoor space!


Leave a comment
All comments are moderated before being published.
This site is protected by hCaptcha and the hCaptcha Privacy Policy and Terms of Service apply.